I sure all of us has one of those friends that has pretty much everything. I have a couple of friends that fall in that category but John is one of those guys that is really hard to find a gift for. He has his own machine shop so he can make anything he wants when it comes to tools. The one thing he doesn't have much of is time. Unfortunately I cant give him a gift wrapped package full of more hours in the day but what I can give him is something he would probably make for himself if he just had the time.
Ten or fifteen years ago I made a little sub plate for the milling machine on a whim. As it turns out this has become a very useful tool that comes out of the box on a regular basis. When I made it I thought it was a cute idea never realizing how handy it would be. I had to make a few plates the other day that had arrays of tapped holes in them which gave me the idea to make a few of these sub plate kits as gifts for machinist friends.

The idea is that this is a scaled down version of the big strap clamp kit that everybody gets with their milling machine. Everything I seem to be working on is shrinking in size so I had a need to hold small delicate parts without crushing them and have access to do the work. The actual plate can be almost any size as long as it can easily fit your primary vise. My original is roughly 6 x 6 and an inch thick. And after years of use is still over .800 thick. Part of the idea is that the plate is semi sacrificial. That is that I don't feel bad if I take a light facing cut on it to make it perfectly flat to the machine. This is particularly important for engraving work. If you poke through once in a while and mark it up its no big deal. The plate is the easiest part of the kit to make.

All the accesories fit in a small plastic box to keep it all together so its ready when you need to use it. Everything is 10-32 here. If you think its too wimpy for real clamping then hear this. A dinky single 10-32 can easily produce over 1200 lbs of clamping force when torqued to 50-60 lb/in.
The sub plate is one inch thick with a staggered array of 10-32 holes tapped in it on one inch centers. I tap them as deep as I can so as I face the plate I don't have to re-tap the holes. Be sure to drill the tap drill holes all the way through or they will retain coolant if you use them as mini pallets in the CNC. They are easier to clean if the holes go all the way through.
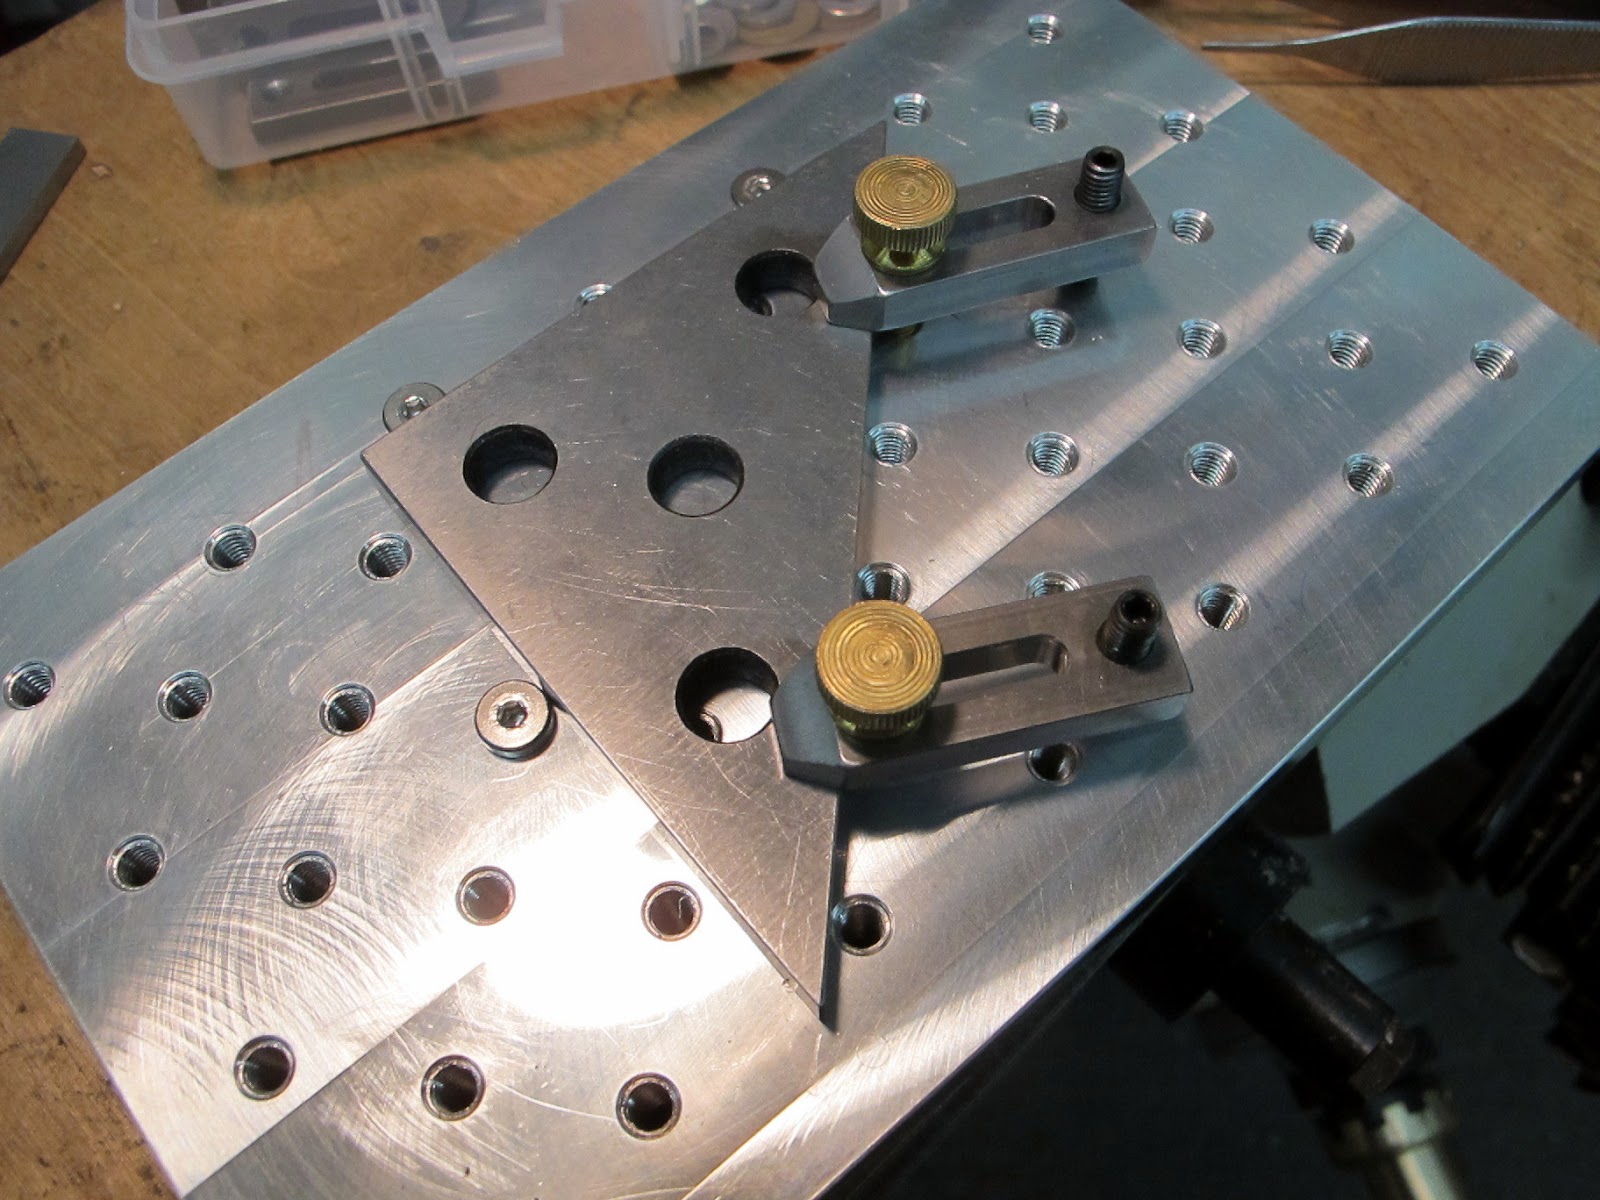
Here are the mini strap clamps. The material is cold rolled steel 1/4 x 1/2. The heel screw is also 10-32. Basic length is 1.5 and 2.0.
I just use set screws for the heel of the clamps. This works fine for low height holding jobs. For taller stuff I just install a long screw with the head down against the plate. In the kit is a variety of different screws and washers. Over the years I have optimized the content for many of the small holding jobs I have come across.
Not sure what I'm going to machine in this picture but you get the idea. This fragile part would be difficult to hold by squeezing it in a vise across two points. Allthread can be substituted for the studs but I like the driver married to the shank for this kind of stuff.
These are low head machine screws. These get used as stops for locating multiple parts. The low head is out of the way and rarely gets nicked when machining close to the surface. I engrave a few small nameplates off and on and these are great for locating the blanks quickly on the plate.
Here are the low head screws used as a gage stop to locate a part on the sub plate. If you make multiple plates then you can load one while the machine is running and have yourself a mini pallet system.
I like these knurled thumbscrews for many clamping jobs. They are quick and for most jobs with small tools you don't need a ton a clamping force.
There are probably at least a dozen ways to hold a part like this. Here is one more for your toolbox of work holding.
The other thing that comes up occasionally is the need for a straight fence. Engraving jobs or parts you need full contact with the gage surface. This is just a run of the mill 1/8 parallel that has the normal two holes in it. If you lucky your set will have hole centers that are even inch increments. This can be indicated accurately with the machine axis for fussier jobs.

Many jobs that you might make a special holding fixture for to clamp directly in the vise can be handled by clamping them down with strap clamps. People forget about this probably because the standard clamps are so big. The other roadblock to strap clamping parts is typically the vise needs to be removed to use the table of the milling machine. I know that I hate to remove the vise for a quick job on the table. This mini strap clamp kit is well worth the investment in time to make if for nothing else so you don't have to take the vise off. Don't count on finding one of these in your stocking this year. Santa only made a couple, so you probably need to get busy and make one for yourself.
Happy Holidays.


Tom,
ReplyDeleteThese are brilliant. When are you going into business with these? I know a bunch of folks who would love to find one in their stockings this year.
Great blog, full of quality nuggets.
Hi Mark,
ReplyDeleteThanks for the nice comment. Santa needs some helpers to keep up with all the projects in the shop. Stay tuned for more nuggets.
Tom Lipton
This comment has been removed by a blog administrator.
ReplyDeleteHi Tom, great stuff just like your book! Feel free to add me to the map, Keith Ward, Newark, OH (East of Columbus).
ReplyDeleteThank you so much for sharing this idea. I made one as one of the first projects on my new (to me) mill in the garage. (http://hvontres.blogspot.com/2013/12/mill-vise-fixture-plate.html) I would also like to thank you for your book and this blog. It is nice to be able to take in some of the wisdom you have earned over the years. Being one of the Engineering folks by day, it helps me to hear more thoughts from the "trenches". I hope I haven't been too bad so far, but I know my designs can always use improvement.
ReplyDeleteHi Henry,
DeleteThank you for the comment and compliment. I like your interpretation of the mini pallet system. You did the right thing and made the design your own. I purposely did not include any drawings as the project is simple enough for anybody and it leaves room for folks to improve upon it. A real open source project. If you have not found it yet I have a nice YouTube channel going. Lots of fun project work going on over there.
Best regards,
Tom
Thank you for your compliments. Yes, I am aware of your youtube channel, but I am still trying to get caught up with all of the stuff over at Turn Wright.
DeleteAs for the drawings, I mostly made them to help me keep track of where I was out on the machine. Since I already had them done, I figured I'd just throw them out there. Plus I guess it's the engineer in me that needs to have a print of everything :)
Hey Tom... I just finished my own. I'm a very new hobby machinist and there were lots of simple yet important lessons in this one! Edge finding, power tapping, slot milling, milling at angles (and the subsequent head re-tramming). Thanks for this idea and for all the invaluable info you post. -Tom Rogan
ReplyDeleteHi Tom,
ReplyDeleteYou have my curiosity going. You mentioned you re-trammed the head. Did you tip the head to do the angles on the noses of the clamps? Glad you hear you had some fun in the shop making them. You will wonder how you got along without them.
Cheers,
Tom
Love the idea and plan on making one soon for myself.
ReplyDeleteQuestion: how wide are the slots in your strap clamps?
-Sam Smith
Hi Sam,
DeleteWide enough for the screws..... Kidding. about .204 for the #10 screws. Thanks for the comment.
----Tom
Thanks. Also, love the videos and just got "Metalworking Sink or Swim" yesterday from Amazon. Can't wait for the weekend when I have time to start digesting it!!
ReplyDeleteHey Tom, I've watched many of your videos and really like the use of the 'mini pallet' that's described in the blog. I'm planning to make my own and was wondering if you purchased the clamps or made them yourself? If you made them yourself, what material did you use?
ReplyDeleteThanks again for all the information you provide.
P.S. I really enjoy the pride you take in your work
Hi Paul,
DeleteThanks for the comment. I made the clamps myself. They are made of cold rolled flat bar 1/4 x 1/2 wide. You can buy them from http://www.rwlsystems.com/Clamps.html
He is really reasonable and you are supporting a fellow metalworker.
Best,
Tom
hermes bags
ReplyDeletetimberlands
mbt
off white hoodie
vapormax
fitflop
christian louboutin
goyard
yeezy shoes
hermes online
curry 6
ReplyDeletesupreme clothing
kyrie 7
birkin bag
supreme new york
yeezy boost 350
lebron james shoes
golden goose sneakers
golden goose outlet
yeezys
link high replica bags reference Dolabuy Fendi her explanation replica louis vuitton bags
ReplyDelete