Wednesday, March 27, 2013

Caltech Instrument Shop Tour

A few weeks ago you may have read a couple of my blog posts about a road trip down to Pasadena. We were working on the Caltech campus doing an installation of a telescope enclosure on top of the isotope handling building. I took a weeks vacation to help my good friend Don out with the work and have some fun.

While we were there I took a couple of "Breaks" and did a little recon around the campus on my own. It was surprisingly open and recon-able. I did my usual thing of acting like I belonged where ever I happened to be. In one corridor I stopped to read some articles on a bulletin board and an article about one of the campus machine shops caught my eye. Next to eating a good shop tour is one of my favorite activities.

The project manager of the telescope project came out one morning to check out the progress we were making on the enclosure. I had nothing to lose so I asked if he could make an introduction and get us a tour of the instrument shop. He readily agreed this should be easy. His only question was which shop? Apparently there are at least seven machine shops on campus. I blurted out, "the biggest one".

While we were waiting for our introduction we took a walk to the student store to pick up some Caltech swag. I work at Berkeley Lab, so wearing a Caltech shirt to work is something about as inflammatory as wearing a Giants jersey to a Dodgers game but with scientists. On the way to the student store my finely tuned machine shop nose smelled cutting oil in the air. I peeked through an open door where and was greeted by the familiar smell of way lube and soluble oil. Nobody was around so I left with a mental note to come back and snoop it out.

On the last day we finally made the connection to the person that runs the instrument shop. Now all we had to do is find it. The shop I smelled when we were walking around campus belongs to the aeronautics department and was not the shop we had an invite to. We found that out by sticking our heads in the door and asking for our tour guide. It turns out the instrument shop is in the basement four floors down in the physics building.
   We went in and headed down the stairs. Two floors down we saw what looked like a shop entrance and poke our heads in. It turns out it was a researchers semi private play shop and not the one we were looking for. The nice scientist that spoke with us directed us to the very bottom of the building for the instrument shop.
Here is a shot of the entrance to the Lauritsen physics building. In all our walking around I was impressed by the architecture and the peacefulness of the courtyards and campus in general. Pools ponds and courtyards with old trees and nice ironwork all around.
We finally made it to the shop where we were supposed to meet our host. Merih Eken the shop supervisor greeted us and gave us a nice tour of his well equipped machine shop. The instrument shop has a good mix of manual and CNC equipment to service the varied needs of their customers. The one limitation seems to be their location. Actually it may not be a limitation at all. Because the shop is in the basement it limits the size of the equipment that can be moved from the ground floor. The freight elevator has a limited size and load capacity. This ultimately limits the equipment size and the size of the jobs they can do. Not necessarily a negative situation. Given a choice most machinist would love to work on Bridgeport and Hardinge sized machining jobs. So if you want to work on small parts on friendly sized machines put your shop in the attic or the basement.
Lots of tool grinders around. If its anything like our shop the grinders outnumber the operators almost two to one. In the olden days we had to grind all our own tool bits. I bet there is a drawer in this shop somewhere with two hundred pounds of high speed steel lathe toolbits.
I really like the two headed drill press. This is a pretty cool setup in a drill press. Many times drill press operations are at least two tools. If you have a setup like this you can drill and ream, or drill and tap with a quick easy to setup machine.
Check out the ropes on the power breakers. In our shop we have to maintain three feet in front of all of our electrical panels. If you have a few panels this translates into a bunch of square footage that is lost and unusable for real work. Having your breakers above the floor like this reclaims the panel clearance floor space.
Merih told us this lathe is reserved for students only. This is secret code for all the staff machinists hate this lathe so lets give it to the students to learn on.
I'm betting the students don't get to use this lathe much. If you cant do good work on a Hardinge HLV-H then you should think of something else you might want to do. They wont peel a quarter inch on a side in stainless but they will hit tenths all day long. If you have never threaded on a Hardinge then you have something to look forward to.
This is one of the larger CNC mills in the shop. Apparently they had to take the thing partway apart to get it in elevator. These Haas tool room mills have a nice open configuration that's easy on the back to load vises and parts.
Check out the cool little clamp rack in the background. I hate clamps thrown in a drawer and its a pain if you have to loosen each clamp to release it from its storage rack. This slick setup is a real grab and go arrangement.
One of the larger Columbian vises I have ever seen. Funny I didn't see any soft jaw covers for this one. That handle and how high the vise is could make a dentist rich.
I really have a soft spot for radial drills. This is a real nice Fosdick that's not too big and not too small. Unfortunately these don't see much work in the average shop anymore. Betcha there are some big drills in that cabinet next to the drill.
This area had a monorail hoist servicing it. Not sure how they use it. My guess is it was set up for some other shop configuration that is lost to time. About the only thing it could service at all is the Fosdick radial drill.
 For those of you that know this is a really nice surface grinder. Power feeds on all the axis and solid Okamoto accuracy. I got the feeling they don't do much grinding in this shop. Outsourcing professional grinding services is pretty easy so its not surprising to see this fine machine not used very often.
 This shot could be a student shop on any campus, in any town. I have a similar room in our building. The cross section of materials and shapes defies any organizational methods or tracking systems. I'd be willing to be they ten kinds of bronze and six or eight ceramic grades in amongst your pedestrian steel and aluminum alloys.
Almost all the CNC machines were humming when we toured. They program the machines with MasterCam and model with Solidworks.One thing I've noticed in southern California shops are KDK tool posts. In the San Francisco Bay area we see mostly Aloris tool posts. I don't know if its my imagination or there is something to my north south tool post observation.

Too bad I ran out of time. Nothing like being on vacation and finding yourself smack in the middle of people doing the things you like to do. I'm hoping the telescope enclosure needs some more work so I can continue exploring the shops on the Caltech campus.

A special thanks to Merih for talking time away from his work to show a couple of complete strangers around. If your ever up in the Bay area I will return the favor.

Thanks for looking.

Monday, March 18, 2013

Jig Bore Worm Gear Repair

Well folks I'm going for full web immersion. I have been shooting video of some of the small projects that normally I would be writing about. I'll tell you that a video certainly has more traction on the web than the measly written word. Don't worry, I'm not giving up on the writing, but If the response to a few amateur video's on broken metal parts is any indicator then it will definitely become part of my bag of tricks.

So the project now is the last broken major part on the Kearney and Trecker Autometric jig bore. The bracket that the worm shaft rotates in was broken during the tip over festival by the previous renter. I shot a video series of the repair so the written description will be shorter. The written blog article is a good format to show some of the more subtle closeups and higher resolution images.
The first step was to remove the WWII vintage machinery green paint from the weld area. I was impressed to see that the Autometric company took the time to prime as well as paint a mundane worm gear bracket buried inside a machine. The paint is more than sixty years old but it was as good as the day it went on. Probably loaded with a bunch of good stuff like lead and toluene.
 The crack fit back together really well. Its almost like a puzzle piece how nice it snaps back where it belongs. I tapped it into tight alignment and clamped it for welding.
Here its ready to be gouged for the weld prep. I used a die grinder with a carbide ball burr to root out the crack for welding. Unfortunately I didn't get any pictures of the gouging but I did shoot some video.
Fast forward a bit. There was a slight misalignment of the two journals that was discovered during assembly that needed to be corrected. I blued and scraped the high spots with a triangular scraper until I had the journal fit the way it should be. For reference I'm using Ni-99 TIG welding rod for cast iron for this repair.
The backside of the bracket. You cant see it but I did weld all the way around the crack. The worm and thrust collar are held to the shaft with small tapered pins.
This is where the bracket lives. It has two positions, engaged so the worm is in mesh with the gear allowing angular indexing of the rotary table, and disengaged so that the main motor is free to rotate the rotary table/faceplate for lathe type operations. I thought it was interesting that when the worm is engaged it rotates the entire drive system. So when the handle is cranked you are actually turning the motor and all the belts you see in the picture.
As you can see in the pictures above this is not a real fine pitch worm and gear. Its something like 40:1 ratio I would guess. Not quite what you would expect for a precision rotary table.
The fellow I got the machine from dropped off the second spindle a few days after I got the machine. I'll be taking a look at that pretty soon. For now the focus is the electrical system. I want to get it running so I can test it out on something.

Check out the video series on the repair part 1.

Thanks for looking.

Friday, March 15, 2013

Jig Bore Handwheel Repair

A few weeks ago I told the story of how I ended up with a damaged Kearney and Trecker Autometric jig bore. As the machine sits in the shop I'm starting to get very curious how I might use this machine. Having a horizontal spindle is a very useful item in any machine shop. The question is how can I use this machine and is it worth the floor space it will take up. Regardless of all that I need to fix some of the damage from the previous owner and get it in running condition so I can play with it or trade it for something else.

Fortunately the damage to the machine was minimal. The nice cast iron handlwheels absorbed most of the energy from the tip over. The shafts that the handwheels were on were not bent so I was glad to discover that. I thought about just buying some similar sized commercial handwheels, but on closer inspection I had all the broken pieces of the cool old school cast wheels. This makes for a interesting repair job.
The wheels are around eight inches in diameter. I thought it was weird that they weren't the same diameter. Maybe this in one of the reasons they went out of business? Just looking at them they looked the same but when I measured the OD with calipers there was around  three eighths difference in the OD. At least the center shaft size was the same at five eighths. What was needed here was a fixture to help me align the broken parts and keep everything concentric. Its important that the handwheel run reasonably true and in plane.
A simple plywood fixture was created to hold everything together. I started with the smaller OD wheel so I could re-cut the fixture for the larger wheel if it all worked. I just cut in from the side for the part with the hole. This allows me to squeeze the gap closed to actually clamp the part a little. All that I needed now was the center alignment shaft.
Got lucky that I had some five eighths steel rod around. I turned the end down because I didn't have a five eighths diameter Forstener bit. Forstener bits are the cats meow for accurate holes in wood. I'll pick up a five eighths Forstener this weekend. I hate to be held up by tooling issues.
The handwheel in the assembly fixture. You can see I closed the gap up and shot a couple of screws into the ears to clamp the wheel tight.
I used a mini grinder with a Walter abrasives Zip cut disc to gouge the cracks for welding. The areas I couldn't reach with the grinder I ended up with a carbide burr on a die grinder. The goal here was to get this securely tacked up and do the welding out of my combustible fixture.
 The welding rod I used is Ni-99 TIG welding rod. Its basically pure nickel rod. It works great for small cast iron repair jobs like this.
Once the wheel was securely tacked I could get it out of the fixture. The sequence was gouge and tack until I had all the cracks prepped for the welding. By this time the wheel was pretty warm which is just what I wanted. No need for a preheat on these other than from the tack welding. I don't have any temp sticks but my calibrated bare hand told me the wheel was around 150F when I got to the main welding. Not hot but not cold either.
As you can see the welding came out pretty good. I managed to save a piece of history. Later on I'll grind and finish the surfaces where your hands contact the wheel. Other than that I don't think I'll fill and blend all the welds.

I did do some experimental video shooting on this job. My still camera shoots OK video so I figured I'd try it out. Please comment and let me know if you like the written stuff better than video or vise versa.
There are more video's in this series on my YouTube channel oxtoolco. Check them out. I still have some to upload.

Thanks for looking.

Thursday, March 14, 2013

Hamburgers and Telescopes Part 2

We discovered a great little lunch spot right down the street from where we installed the Aqawan at Caltech. My first vacation lunch there consisted of a tuna melt with homemade macaroni salad, lemonade, a strawberry milkshake, and a piece of banana meringue pie. I have never seen banana meringue pie anywhere before. Needless to say I was stuffed and useless the rest of the day. But hey, I was on vacation anyway.
 I getting hungry again looking at this picture. The installation of the roof panels went off without a hitch. There were quite a few mechanical details to take care of before we could actuate the roof clamshells.
In this picture you can see the roof opening and closing mechanism better. A common shaft is driven by two separate gear motors into a chain directly connected to the roof sections at each end. The black tubes house a steel counterweight that keeps the slack side of the chain tensioned. The gearmotors are 24V DC with 100:1 gear reducers. You can also see the vee groove track wheels that run on an inverted angle welded to the top of the frame in this shot.
A closer shot of the chain connection to the roof clamshell. The chain is driven by a sprocket keyed to the shaft. The upper and lower sprockets are just chain guides.
This is one of my favorite things. Since we didn't have the electrical control panel yet we had to operate the gearmotors someohow. Don is always thinking and came up with this field expedient tool to open and close the roof. You don't get too many actuations off a battery charge but you can open and close them.
We added sheetmetal to the ends and painted the whole thing. The painting was the worst part. The reflection in the hot sun combined with two coats of bright white paint made for some blinded painters. I managed to not get any paint on my shirt until the very last panel.

After all the hard work there was a little time to snoop around the Caltech campus. I'm telling you these kids have a great place to go to school. Just the architecture is impressive. All the lighting fixtures and door hardware are top of the line hand made artisan stuff. The walls between the stalls in the one restroom we were using were solid marble panels.
Looking toward the Millikan pond.
This beast caught my eye. Rock Island Arsenal  Model 1890 on a 1900 mount.
Underneath was a cool differential square thread elevation adjuster.
 A sample of some of the building facades. This is the building with the coelostat on the roof. 
As we were walking around I noticed an open door to one of the machine shops. When we got back to the Aqawan I spoke to the project manager and asked If he might make an introduction for me to get a short tour. He was more than happy to help out. Apparently there are quite a few machine shops on campus so there was some confusion as to which one to go see. I told him whichever was the largest one.
It turns out the largest machine shop on campus is in the basement of the physics building. Stay tuned for an article on my adventure in the basement.

Thanks for looking.

Sunday, March 10, 2013

Hamburgers and Telescopes Part 1

For most people their idea of a vacation is to travel to a different place with friends, relax and take in some sights, and eat a few good meals. If that is the definition of a vacation then I guess this week long trip to southern California qualifies.

I have a good friend named Don who asked me to help him with an installation job in southern California. Don is one of those friends that is always there when you need him.  I could call him right now and say I really needed his help and he would drop what he was doing and load up and be here in a few hours. He is one of those friends that you cant let down. He would never hold it against you if you couldn't make it but you better be almost dead if you wimp out or you will never hear the end of it.

A couple of months ago Don helped me move the engine lathe I bought using his heavy duty truck and trailer. The scales had definitely tipped in his favor so I was really on the owing side of the fence.When he asked for my help with this project I jumped at the chance to help out. Actually I would have helped him regardless. The installation was interesting to me technically and a great opportunity get out of town for a while with some friends.

Don has been building telescope enclosures for the :Las Cumbres Observatory telescope network. He built one of the first prototype clam shell Aqawan enclosures three years ago and has building them for LCOGT ever since. Ultimately the non profit company wants to link an array of telescopes positioned all over the world and allow professional astronomers and citizen scientists to schedule time on the instruments. Most of the intended locations are remote and require the instruments to be protected from the weather by a remote controlled enclosure like the one below. Pretty nerdy stuff for a guy that is normally a cow puncher.
The Aqawan's have a tubular steel frame and two interlocking clam shell roof sections. The roof sections are driven by two 24v gear motors. Connections to the roof sections is by roller chain. Interestingly they are not counterbalanced at all other than to keep the chain tensioned. The corner of the enclosure that runs on the top edge of the wall rolls on a vee groove track roller.

My part in the story was volunteering to assist my friend Don with an installation on the top of a building in southern California. A group of Caltech planet hunting astronomers are developing the next generation of detection instruments to find earth size planets by measuring tiny wobbles in distant stars. Ultimately the enclosure we installed at Caltech will be moved to a mountaintop in Arizona.

This adventure all started on a Sunday morning with loading the trailers with all the various Aqawan parts and tools. But first there were a couple of machining details to clear up.
This is Don's milling machine. Its actually an old Atlantic jig borer. He bought it from my old toolmaker friend Charlie that I have mentioned here on the blog. Its actually a nice little machine. My first task was to make some shackle plates for the trailer. This was more of a self preservation move on my part. After my last go around with these worn out heavily used trailers I jumped at the chance to save some road side repairs.
I just used a square scribed the hole centers and drilled them. Not very exciting as far as the machining world goes. I couldn't find a single scriber in the shop so I improvised and sharpened a drywall screw. I found a bunch of horseshoe nails but they aren't very hard.
It actually worked pretty well. These screws are pretty hard so it easily scratched steel. I'm sure it will be on the welding table the next time I visit.
The next assignment was to modify a couple of Aqawan parts to accept retaining roll pins. These are stops that are spring loaded that the enclosures halves close on. Normally I would never put an end mill in a nice Albrecht drill  chuck but what the heck I'm on vacation why fight it. I'm going with the flow on this adventure.
We were ready to load the wall and clam shells sections onto the trailers. Don fired up the farm "forklift" and we rigged the sections up for lifting.
One of the wall sections of the Aqawan being moved out of the barn, I mean shop. We wanted the wall sections to stay vertical during transport to make the erection and unloading easier at the job site.
We managed to get everything loaded before dark. There were a few details to take care of in the morning before we shoved off the dock.

One of the important details was to install the new shackle plates I made the day before. The old ones were so worn the holes looked like slots.
After changing the plates we were off. I takes an hour to get from the remote site of the shop to the freeway. With trailers we were limited to less than sixty miles per hour. Its a long drive to LA at fifty five or sixty.
Its an even longer drive if you have to stop to repair the trailer along the way. I was in the truck following the creaky trailer and noticed some tire smoke off the right side when the trailer hit a big bump. We pulled off the road to make a few field expedient modifications.
 This little block of wood saved the day. It lifted the spring just enough with the load on the trailer so the tire didn't rub on the trailer frame. It managed to stay in the whole trip down and back.
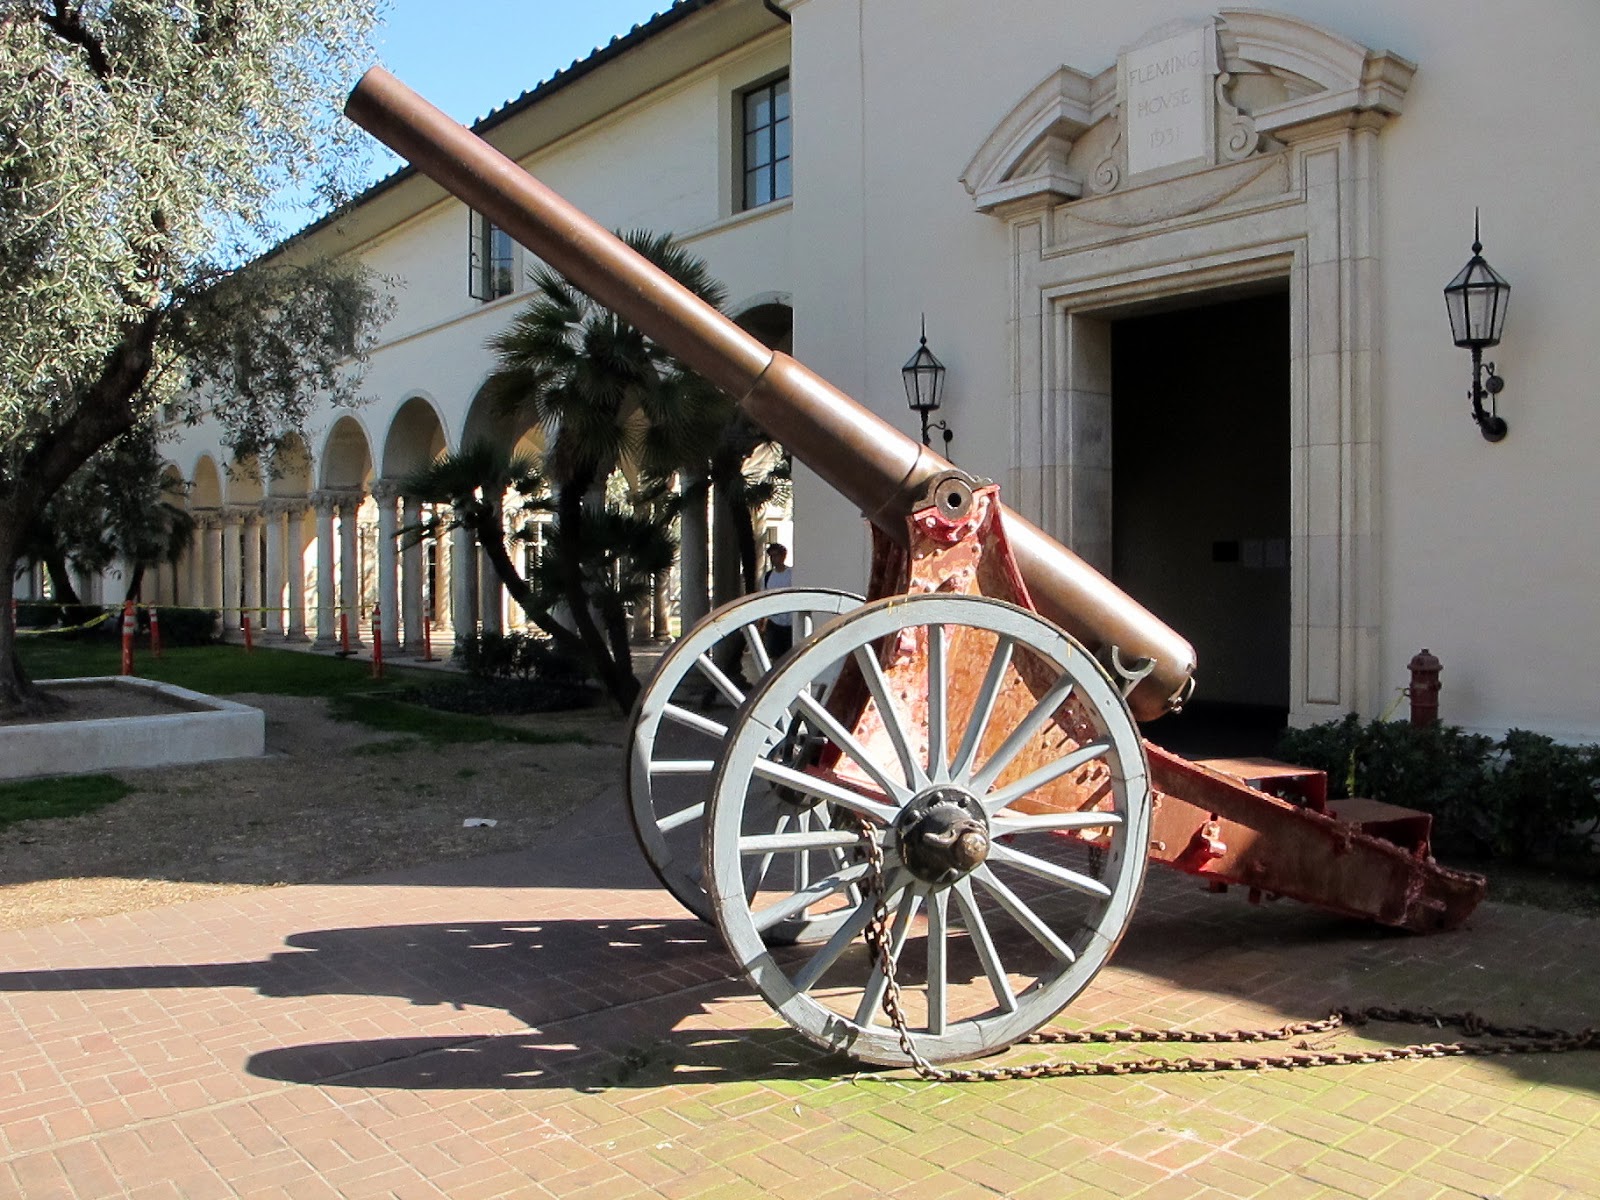
The remainder of the road trip was unremarkable other than some crappy fast food. We were able to drop the trailers at the installation site on the Caltech campus late the same night. The observatory dome on top of the building you see in the background is not a telescope but a solar light director called a coelostat . The dome follows the sun all day long and pipes the sunlight throughout the building with fiber optics augmenting the buildings electric lighting. 

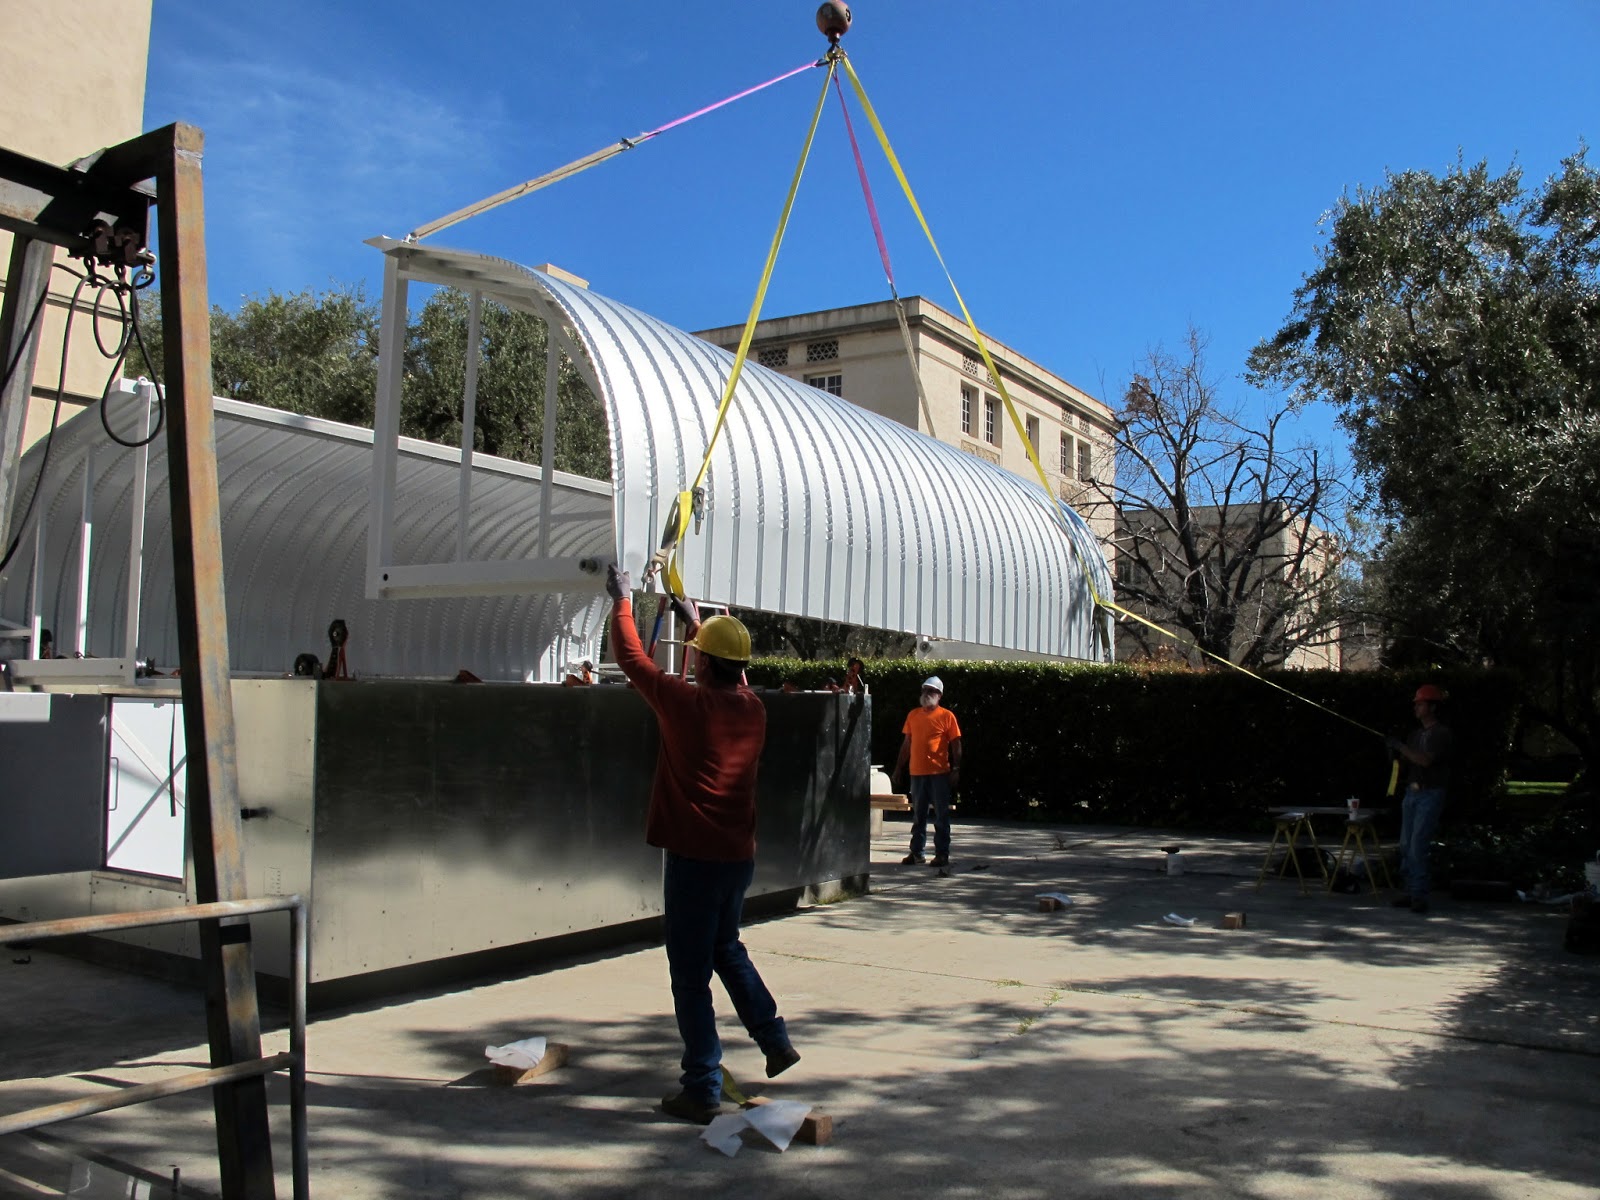
This is the big installation day. We have a crane coming this morining to hoist the clamshells and wall sections into position on the building.
Most of this building is below ground. Only about three feet of the building is above grade. It is the isotope handling building where they do some work with radioactive materials. Don had poured the small slab and telescope footings you see in this picture on a previous trip.
The crane showed up right on time. We jumped right into it rigging up the first set of shells and walls. The trailers are parked behind the trees you see on the sides of the crane. The radius was only about thirty feet but the height we needed to clear the trees was pretty good.
 Shamrock crane sent a neat little five ton rig built on a Ford F-750 chassis. Mike the operator told us he can pick a thousand pounds sixty feet straight out which is fairly impressive. The clamshells and wall sections are fairly light but the crane access was pretty limited.
One of the long wall coming over the pesky tree. We needed to set the walls first and then re-rig the clamshells to install them on the walls.
In this shot were squaring and leveling the walls of the Aqawan. Mike the crane guy is waiting for us to get everything ready for the next lift.
With the walls squared up and level it was easy work to land the walls in place and connect the pivot links. I would hate to think about trying to do this without the crane. I would have been tempted to rent the thing myself it Don hadn't already done it.
Second side. We were able to rig the sections level by adjusting the heavy duty ratchet straps. The pick points were threaded holes with eye bolts.
It only took about three hours from start to finish to get to this point. The boss let us get some lunch after the crane left. The crane was on the clock so we wanted to be done with it as quickly as possible.

We ended up finding a great lunch spot right down the street. How can you go too far wrong with a place called Pie 'n Burger.

Stay tuned for part 2. Thanks for looking.